The Complete Guide to Installing and Configuring a Next.js Project in 2022
All you need to start coding with Next.js in a matter of minutes
Software Engineer, Content Creator, and Open-Source contributor
In this article, we will install and configure a Next.js project, including:
Adding SASS / SCSS support
Setting up Eslint and Prettier
Setting up Eslint to run automatically before every commit (via a Git hook)
Setting up Semantic Commits (via a Git hook)
Any of the above items are optional and can be skipped during the process.
For example, if you are not familiar with Semantic Commits or do not plan to use it, you can skip that part and move on to another.
You may want to bookmark this article and use it as a reference when creating your projects. I will try to keep it up to date, and when I discover a new useful feature, I will include it here.
Let's get started.
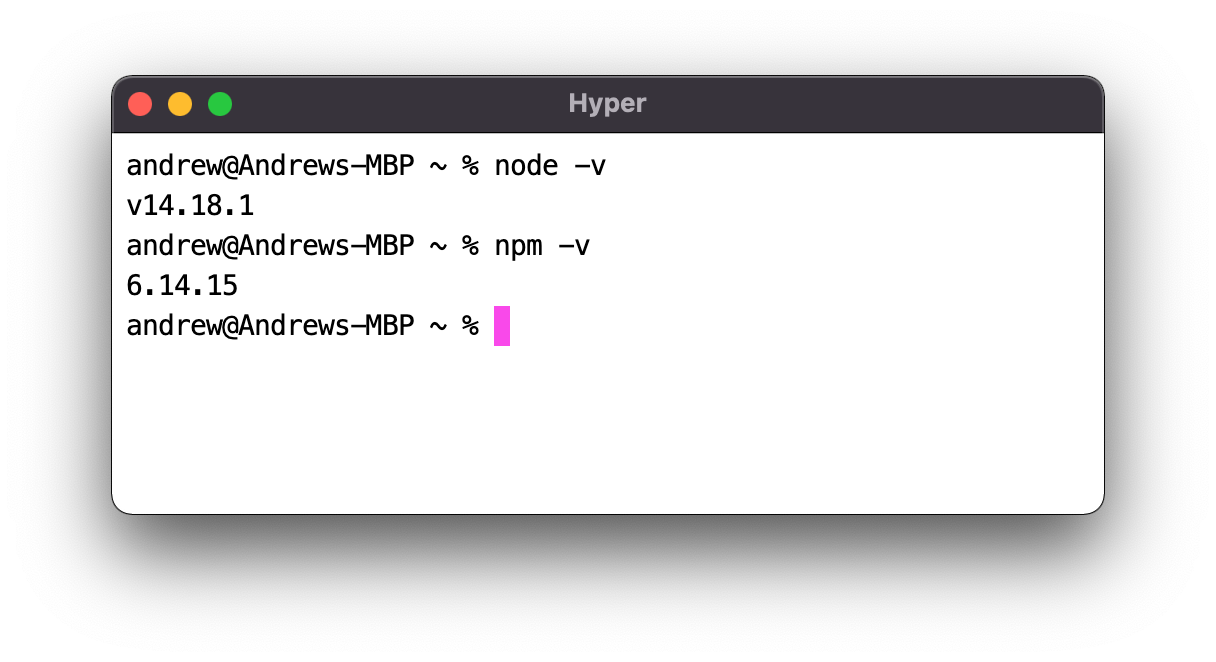
1. Install Node.js and NPM
We need Node.js 12.22.0 or later in order to install and use Next.js.
To see if you already have Node.js and NPM installed on your machine, run the following commands:
node -v
npm -v
You should see the installed version printed for each command.
If you do not have this output and instead see command not found or a similar error, download and install Node.js from the official website: https://nodejs.org/en/download/
2. Install Next.js
Open your terminal, navigate to the folder where you want to create a new project, and run the following command:
npx create-next-app@latest
During installation, you will be prompted to name the project, enter the most appropriate name, and press Enter.

Congratulations! You have installed Next.js.
You can stop here and work with your application already by running the following command in the directory we just created (you named it during the installation).
npm run dev
However, if you want to add some configuration, open the project in your favorite code editor and follow the next steps. Each of the steps is optional, you can choose ones that suit you best.
3. Configure .gitignore for JetBrains products
Note: This step is optional.
If you are using any of the JetBrains code editors (such as WebStorm or PHPStorm), it is recommended that you exclude certain folders and files from version control.
You may use the following preset: https://github.com/github/gitignore/blob/master/Global/JetBrains.gitignore
Just copy and paste the content into your .gitignore file.
4. Adding SASS / SCSS support
Note: This step is optional.
If you plan on using SASS / SCSS, run the following command:
npm install sass
Now go to the styles folder, you should see two .css files there:
styles/globals.css
styles/Home.module.css
Rename them to .sass or .scss as you prefer.
After you renamed the files, you need to change the paths to them in:
pages/_app.js
pages/index.js
That is all! The rest will be handled by Next.js. You can now use SASS in your project.
5. Setting up Eslint and Prettier
Note: This step is optional.
Eslint is already installed in your Next.js project by default. The configuration file (.eslintrc.json) can be found in the root directory of your project.
However, it is not automatically called when you run the application in development mode (npm run dev). This is why we are going to set up a Git hook in the next step, but first, let's install and configure Prettier.
Run the following commands to install Prettier:
npm install --save-dev prettier
Since Eslint also contains code formatting rules, which can conflict with your existing Prettier setup, installation of eslint-config-prettier is recommended.
To install the config, run:
npm install --save-dev eslint-config-prettier
After the installation, create a config file for Prettier (.prettierrc.json) in the root directory of your project. Here is a sample configuration.
{
  "singleQuote": true,
  "semi": true,
  "tabWidth": 2
}
Now, add prettier to your existing Eslint config (.eslintrc.json): json { "extends": ["next/core-web-vitals", "prettier"] }
Done, now you can use Prettier and lint your code by running npm run lint.
6. Setting up Eslint to run automatically before every commit
Note: This step is optional.
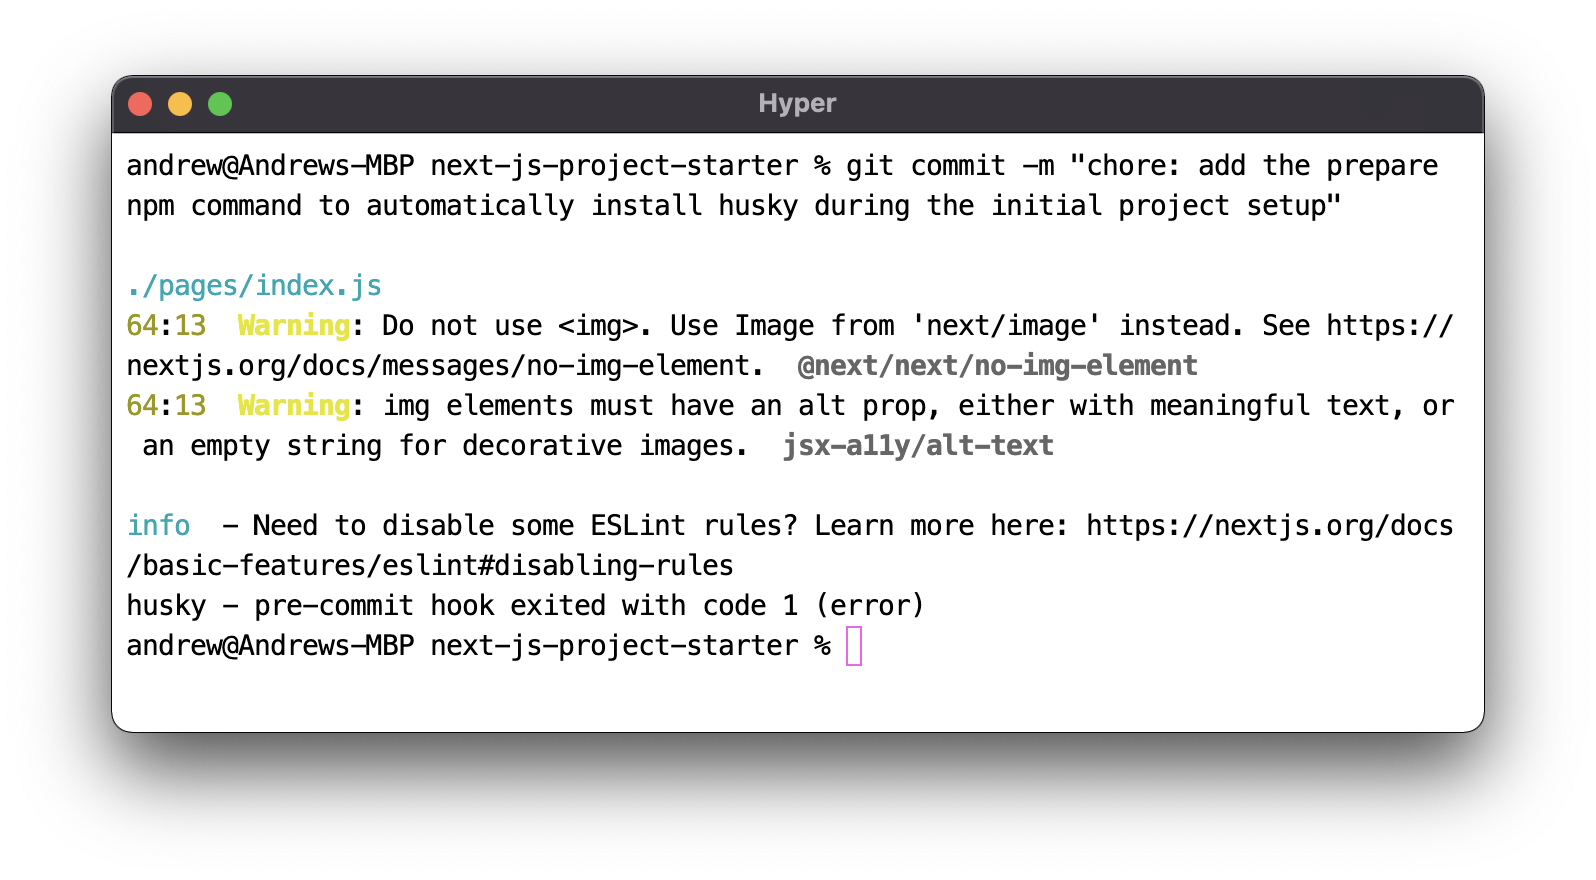
To prevent code with Eslint errors or warnings from being pushed to your working repository, you can set up a Git hook that will run the next lint command every time you try to send a commit.
In case of Eslint errors, your commit will not be sent and you will see an info message with error/warning details. See the example below.
In order to set up Git hooks, we need to install Husky (npm package):
npm install husky --save-dev
After the installation, add the prepare script to your package.json file:
...
"scripts": {
    "dev": "next dev",
    "build": "next build",
    "start": "next start",
    "lint": "next lint",
    "prepare": "husky install"
},
...
Then run it once, it will create a .husky folder with the required configurations.
npm run prepare
Husky is installed and it is time to create our first Git hook.
Run the following command:
npx husky add .husky/pre-commit "next lint --max-warnings=0"
This command creates a pre-commit hook that executes next lint command every time you try to send a commit.
The --max-warnings=0 flag is optional and can be removed in order to allow pushing the code with Eslint warnings. The info message will only appear in case of errors.
7. Setting up Semantic Commits
Note: This step is optional.
If you are familiar with Semantic Commits, you may want to add validation to ensure all commis is in the correct format.
To do so you need to have Husky installed (see step 6 in this tutorial).
After Husky installation, we need to install the @commitlint npm package:
# Install commitlint cli and conventional config
npm install --save-dev @commitlint/{config-conventional,cli}

# For Windows:
npm install --save-dev @commitlint/config-conventional @commitlint/cli
Then we need to configure commitlint to use conventional config:
echo "module.exports = {extends: ['@commitlint/config-conventional']}" > commitlint.config.js
And finally, add a hook that will check the validity of commit messages:
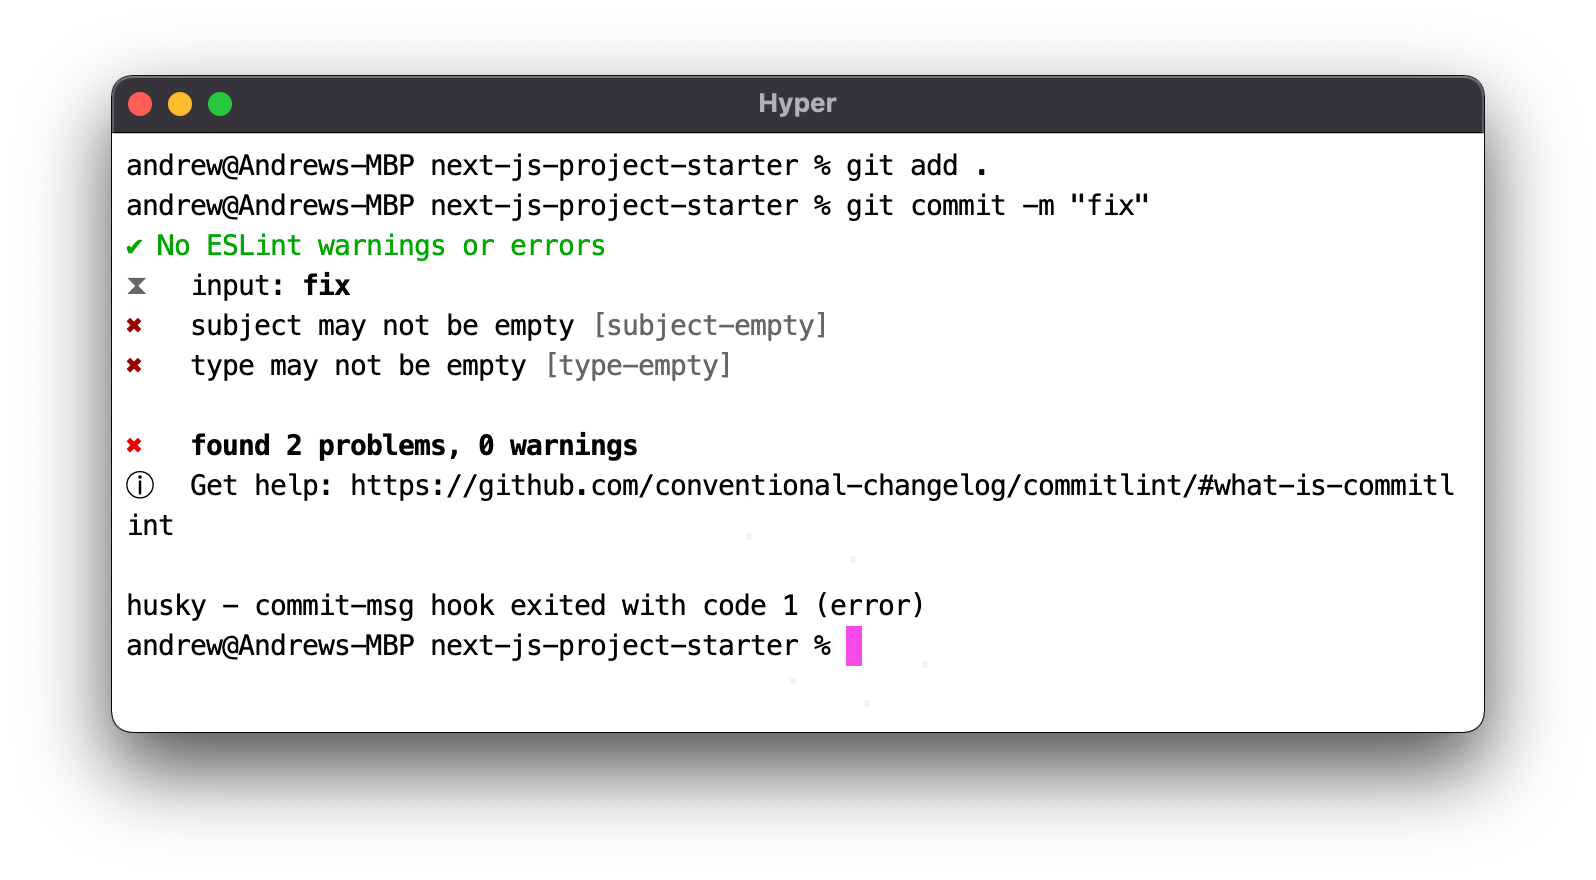
npx husky add .husky/commit-msg 'npx --no -- commitlint --edit "$1"'
Now, if you try to send a commit that does not follow the Conventional Commits rules, you will see the following error:
If you would like to see the final results of the project described in this article please take a look at the Github repository: https://github.com/AndrewSavetchuk/next-js-project-starter
The end. I hope you found this information helpful, stay tuned for more content! :)